22nd Jul 2012

The Electricity meter has been moved to its new location and the old box has gone. This was completed in only a couple of hours in the pouring rain with the builder, the electrician and the Electricity company engineers all involved. This was one of those jobs that required a fair bit of sorting out so that everyone was able to work together and have it moved with minimal disruption. They all did a great job.


The steel work has been completed. to support opening the existing kitchen into the extension, along with the joists to support the 1st floor. It is now at the stage where it is possible to really get a feel for the extra space that will be created.

The new steel beams can clearly be seen in the garage which will support the floor and outer walls above. Fortunately the builder has been able to raise the original roof trusses that were on the garage as progress has been made upwards. It will all need to come off at some point, but currently it is helping keep most of the rain out.


The temporary electricity distribution point is covered by the black sheeting in the centre of the photo above. This has worked well and we haven't had any problems with the electricity and water.

Below another view of the steel work in the garage, the 1st floor joists and the rear garage door now that it has been moved to its new location. We decided to re-use the existing garage door, as we didn't want to run the risk of not being able to afford to finish a bathroom because we had ran out of money. If at the end of the project we have surplus money (unlikely) we can always replace the door then.
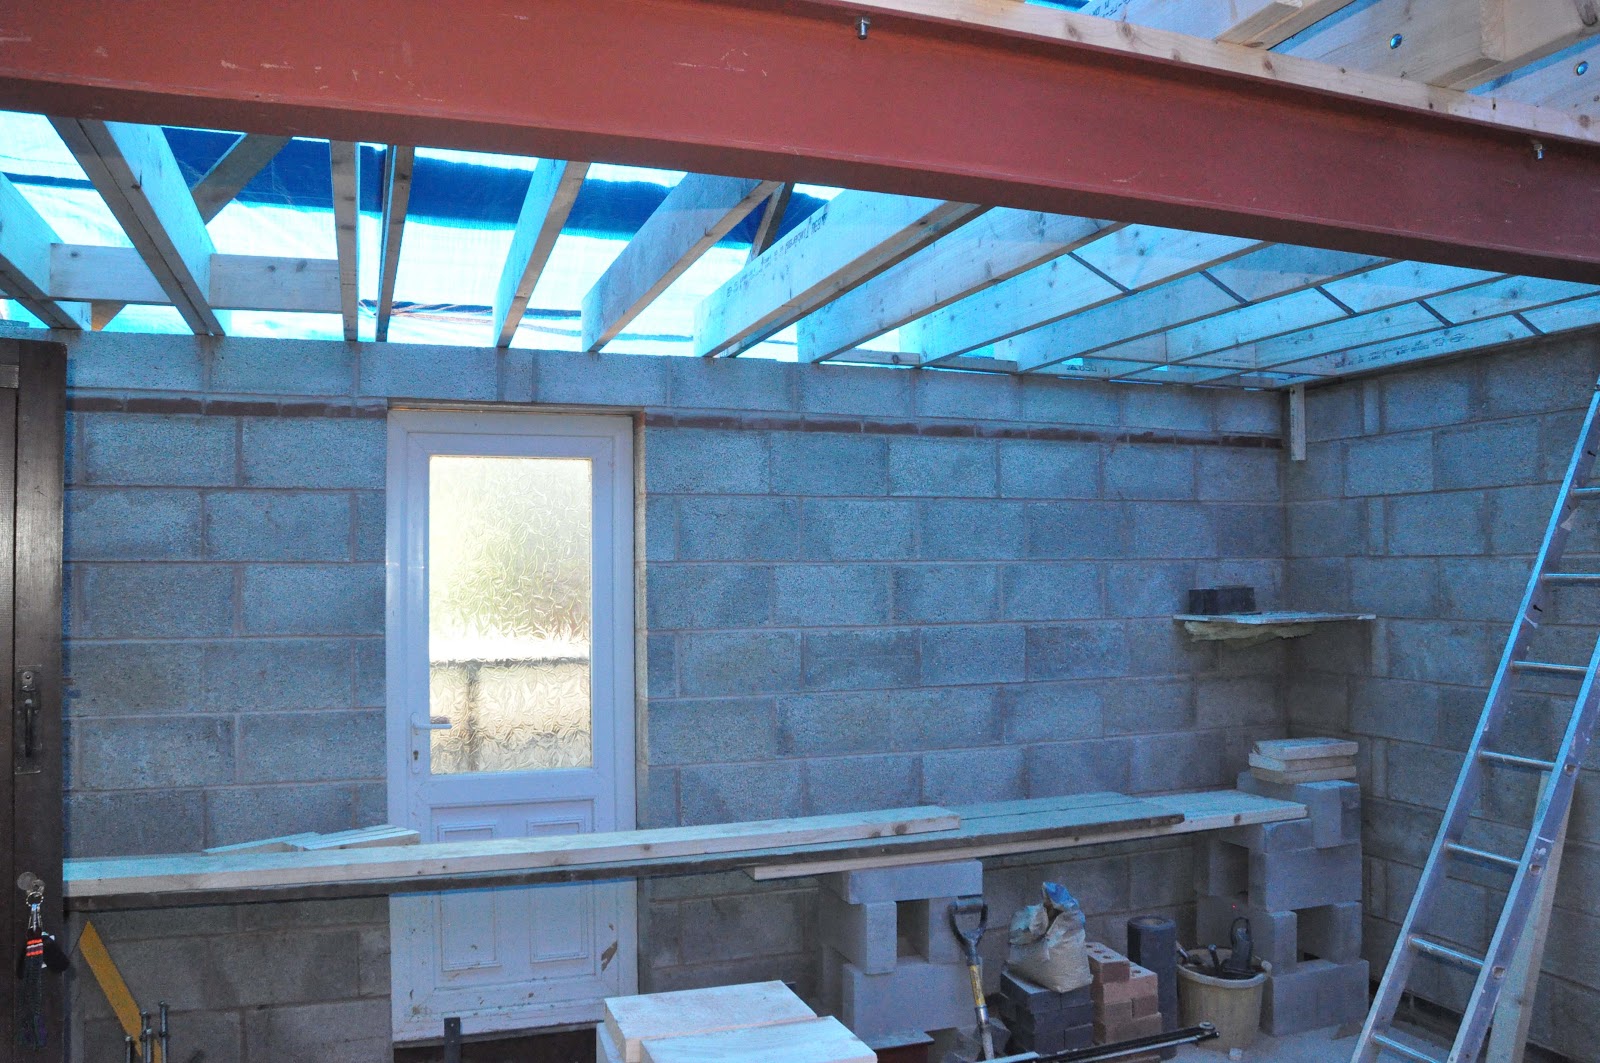

In the photo above, in the far right corner, is a shelf. This shelf will be used to support a communications cabinet for the structured wiring that I am planning on installing. It seemed a good idea to build support into the new block wall now rather than try to fix the cabinet onto the wall later unaided. The supports are steel belts tied into the block wall and should have no problem supporting a cabinet. More details about the cabling will be included when we get to that point, at the moment its all about planning ahead and trying to structure things accordingly now rather than struggle later. Fortunately the builders are great and always have time for a chat to talk through ideas and include them if possible.

25th Jun 2012

So far this has been the only real disruption to the existing house. The utility room has lost its window, half a wall along with the sink and worktop which have been removed. Fortunately the builder has been able to rig up a temporary drainage outlet for the washing machine, so that is still in full operation.


The existing electricity meter located next to the original back door, needs to be moved otherwise it will be in the kitchen when the extension is finished. The white box is the back of its new position. Note the temporary drainage for the washing machine is clearly visible outside.


In the photo below viewed from the front, the gas meter in the black box was able to be left in its original position, to do so the plans were amended slightly to recess the new wall by a couple of inches. This was done in collaboration of the building inspectors to avoid any potential legal problems.


The photo above also show the moveable join (soft white foam) between the existing garage wall and the new adjoining wall. This should avoid some of the cracking problems should there be movement between the two original structures.

Back in the garage for this photo, you can see the insulation between the outer original wall and the new block inner wall. We decided to do this just in case we ever converted the garage into a liveable room in the future. The original garage roof is still pretty much in place, although the tiles have been removed. Currently it is covered with a tarp to keep the worst of the weather out.


In the photo above, the old counter top and sink from the utility room can be seen. I am thinking of reusing this in the garage to ease washing the car and hands etc. without having to go into the house. It seems daft to throw it away only to think about buying a cheap replacement for the purpose.


The back garden has become a storage area, fortunately with the aid of a fence the builder has left the majority of the garden still available for the family to use. All the roof tiles from the original garage roof can clearly be seen awaiting to be used when the new extension roof is in place.


The path above will become the new entrance to the rear garden, it also serves as somewhere to put a skip without having to get permits to leave it on the public highway.

1st Jun 2012

Today the bricks and blocks are being delivered. I have no idea about these things, but it doesn't look enough to me, the builder is confident though. I trust his judgement, I've seen his work before and it always looked good with no holes or gaps due to lack of bricks.

30th May 2012

From the outside, it doesn't look like much has changed. There has been a lot of work completed though. The garage roof tiles have been taken off, yet another skip of rubbish is ready to be taken away. Thankfully these days the skips go to recycling places rather than landfill.


As you may have noticed from the grey sky, especially on the photo above, it doesn't feel like summer has arrived yet.


The concrete has been laid, both inside the garage to strengthen the footing for the additional weight and in the area shown below between the existing garage and the house.


17th May 2012

Feels like progress is really being made now, the ground works are well under way. This has been hard work, not for me, I've just been making the coffee... The builders have had to contend all the holes and footings they have had to dig, being constantly flooded with water. The ground is saturated, hopefully summer will bring some finer weather.

First some outside photos. This one is taken looking down the right hand side of the garage from the front. It is where the BMW was parked in the earlier photo.


The next two photos are taken on the left hand side of the garage, first the view from the front, then the view from the back garden.


A photo taken further back showing the rear of the garage, the board is covering what will be the new location for the garage door.


A temporary solution to the down pipe from the gutter can be seen in these photos. There is no way Incy Wincy will make it all the way up there again.


The next few photos show the footings being dug out in the garage to add strength and support for the inner wall which is to be built later. The first two photos are taken from the back corner of the garage looking towards the road from both above and below the garage floor level.


In the photo above, you can see just how much of the clay and soil that fell away under the concrete garage floor due to all the water that kept filling up these trenches. This was just prior to the concrete being poured, you can see all the re-enforcing bars already in place ready for the concrete.

The next two photos are taken along the back wall of the garage, you can see the cut out for the new garage door position in the wall on the right.